To Grow è un argomento fondamentale che merita un’analisi approfondita. A store-bought tomato and a homegrown tomato aren’t even the same food. I’m not exaggerating. The first time I picked a ripe ‘Brandywine’ off the vine, still warm from the afternoon sun, and sliced it onto bread with a little salt — I finally understood why gardeners talk about tomatoes the way other people talk about religion.
Tomatoes are the most popular vegetable grown in home gardens, and with good reason. They’re productive (one plant can yield 10-15 pounds), versatile (fresh eating, sauces, canning, drying), and genuinely satisfying to grow. They do require more attention than lettuce or radishes, but the payoff is worth every minute.
I’ve grown tomatoes for seven seasons now — in raised beds, in-ground rows, and containers on a balcony. Questo è particolarmente rilevante per to grow. Some seasons were amazing. A few were humbling. Everything I learned through both the victories and the disasters is in this guide.
📑 Table of Contents
- Choosing the Right Tomato Varieties
- Determinate vs. Indeterminate: Why It Matters
- Starting Seeds Indoors vs. Buying Transplants
- Planting Tomatoes the Right Way
- Watering, Feeding, and Mulching
- Pruning and Training for Maximum Harvest
- Solving the 8 Most Common Tomato Problems
- Best Companion Plants for Tomatoes
- Harvesting, Storing, and Preserving
- The Complete Tomato Growing Timeline
- Grow Your Best Tomatoes This Year
- Frequently Asked Questions
Choosing the Right Tomato Varieties
With over 10,000 tomato varieties in existence, picking the right ones for your garden feels overwhelming. Questo è particolarmente rilevante per to grow. It doesn’t have to be. Focus on two questions: What will you eat? And how much space do you have?
If you eat tomatoes mostly in salads and as snacks, grow cherry and grape varieties. Questo è particolarmente rilevante per to grow. If you make sauces and can, grow paste types like ‘San Marzano’ or ‘Roma’. If you want thick slices for sandwiches, grow beefsteaks. If you have limited space or grow in containers, choose compact determinate varieties.
🍒 Sun Gold
Cherry • IndeterminateThe gold standard of cherry tomatoes. Questo è particolarmente rilevante per to grow. Intensely sweet, almost candy-like flavor. Incredibly productive — one plant can produce hundreds of fruits. My personal favorite for snacking and salads. Ripens to orange-gold.
🍒 Sweet 100
Cherry • IndeterminateLong clusters of small, bright red fruits with excellent sweetness. Questo è particolarmente rilevante per to grow. Vigorous vines need strong support. One plant is truly enough for a family — they produce relentlessly from midsummer to frost.
🥩 Brandywine
Beefsteak • IndeterminateThe heirloom king. Questo è particolarmente rilevante per to grow. Large, pink-red fruits with complex, rich flavor that beefsteak lovers obsess over. Late to mature (80-90 days) and prone to cracking, but the taste is unmatched. Needs patience and full sun.
🥩 Celebrity
Slicer • Semi-DeterminateAn All-America Selection winner. Questo è particolarmente rilevante per to grow. Medium-large fruits with good disease resistance (V, F, N, T). Compact enough for small gardens but productive enough to satisfy. The reliable workhorse variety — never flashy, always delivers.
🫙 San Marzano
Paste • IndeterminateThe sauce tomato. Questo è particolarmente rilevante per to grow. Elongated, meaty fruits with few seeds and rich flavor. Makes the best homemade marinara you’ll ever taste. Needs staking and a long, warm season to produce its best.
🫙 Roma
Paste • DeterminateCompact plants, heavy production, meaty texture. Questo è particolarmente rilevante per to grow. Perfect for beginners who want sauce tomatoes without managing sprawling vines. Determinate habit means harvest comes all at once — ideal for canning days.
Determinate vs. Indeterminate: Why It Matters
This is the most important distinction in the tomato world, and many beginners don’t learn it until they’re already confused about why their plants behave so differently from each other.
| Feature | Determinate (Bush) | Indeterminate (Vining) |
|---|---|---|
| Growth Habit | Grows to a set size (3-4 ft), then stops | Grows continuously until frost kills it (5-8+ ft) |
| Harvest | All at once over 2-3 weeks | Continuously from midsummer through frost |
| Pruning | Minimal — don’t prune heavily | Regular sucker removal recommended |
| Support | Simple cage is fine | Tall stakes, heavy cages, or trellises |
| Space | 2-3 ft apart | 3-4 ft apart |
| Best For | Containers, canning (harvest all at once), small spaces | Fresh eating all season, maximum total yield |
Most beginners do well starting with one determinate variety (like ‘Roma’ or ‘Celebrity’) and one indeterminate cherry (like ‘Sun Gold’ or ‘Sweet 100’). The determinate gives you a concentrated harvest for sauces. The indeterminate gives you fresh snacking tomatoes all summer long.
Starting Seeds Indoors vs. Buying Transplants
Both approaches work. The choice depends on how much control you want, how many varieties you’re interested in, and honestly — how much patience you have.
Buying Transplants (The Easy Path)
Garden centers and big box stores carry tomato seedlings every spring. You skip 6-8 weeks of indoor seed starting and jump straight to transplanting. The downside: variety selection is limited. You’ll find ‘Better Boy’, ‘Big Boy’, maybe a cherry variety, and a handful of others. If you want specific heirlooms or unusual varieties, you’re mostly out of luck.
When buying transplants, look for stocky, dark green plants with thick stems. Avoid leggy seedlings that are tall and thin — they’ve been stretching for light and are weaker. Check the undersides of leaves for pests. Healthy transplants shouldn’t have any yellowing, spots, or wilting.
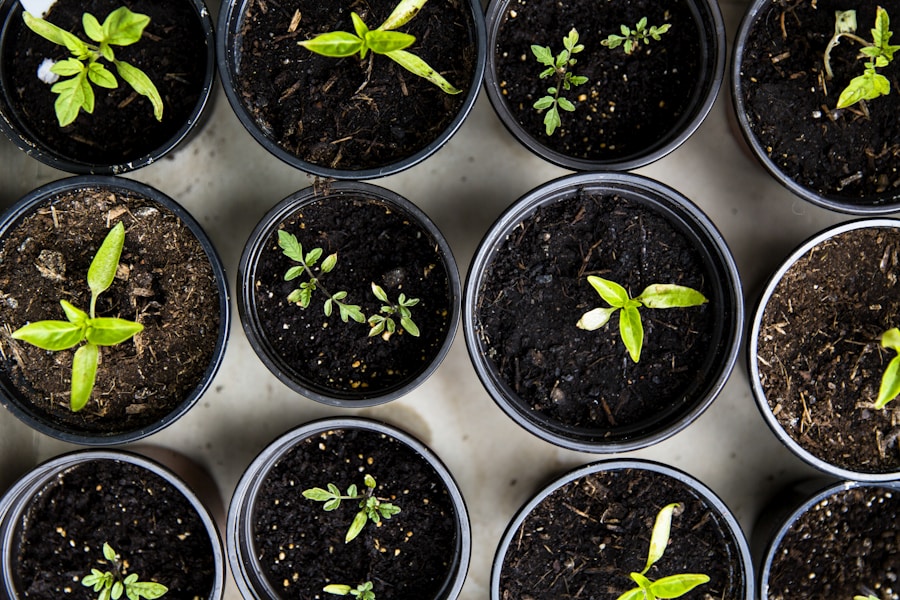
Starting From Seed (More Work, More Options)
Start tomato seeds indoors 6-8 weeks before your last frost date. Plant seeds ¼ inch deep in sterile seed-starting mix, keep the soil warm (75-85°F) until germination, then provide bright light (a south-facing window or grow lights) for 14-16 hours daily.
Transplant seedlings into larger pots once they develop their first set of true leaves. A week before moving them outdoors, “harden off” by gradually exposing them to outdoor conditions — a few hours of shade the first day, then increasing sun and time outside over 7-10 days.
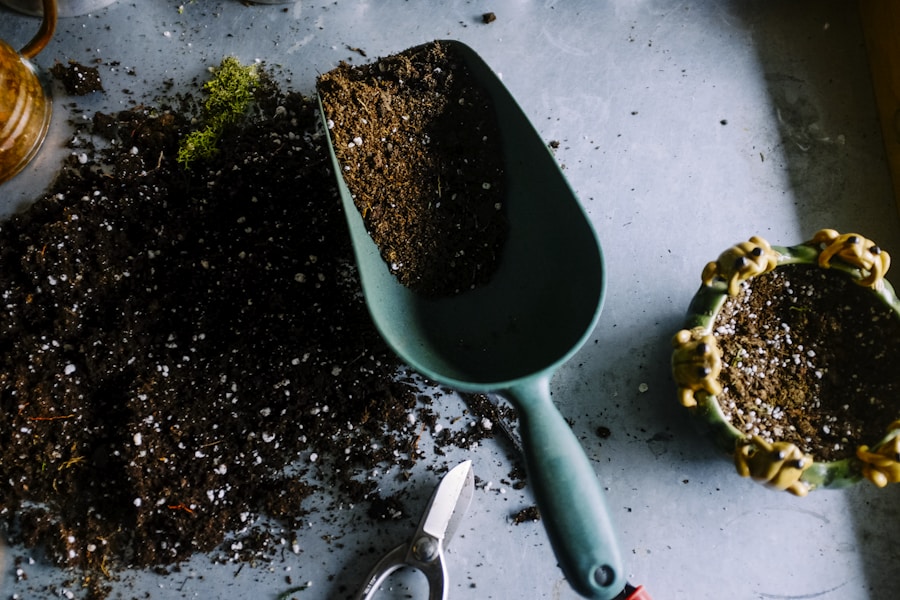
Planting Tomatoes the Right Way
How you plant a tomato makes a bigger difference than most people realize. There’s a trick that experienced growers swear by: bury the stem deep.
Tomatoes are unique among vegetables — they develop roots along any buried portion of stem. Bury the plant so that only the top 3-4 sets of leaves are above soil. All those tiny hairs on the stem? They become roots. A deeply buried tomato develops a much stronger root system, anchors better, and accesses water and nutrients from deeper in the soil.
The Planting Checklist
- Timing: Transplant outdoors after all frost danger has passed AND nighttime temps are consistently above 50°F. Soil temperature should be at least 60°F.
- Spacing: 24-36 inches between plants for determinate types; 36-48 inches for indeterminate. Crowded tomatoes get more disease — always.
- Depth: Remove lower leaves and bury 2/3 of the stem. Alternatively, dig a trench and lay the stem sideways, bending the top portion upright.
- Support: Install cages, stakes, or trellises at planting time. Adding support later risks damaging established roots.
- Compost: Mix a shovel of quality compost into each planting hole. Tomatoes are heavy feeders and appreciate rich starting conditions.
- Water: Soak the planting hole deeply. Water daily for the first week as roots establish.

Watering, Feeding, and Mulching
More tomato problems trace back to watering mistakes than any other single cause. Too little water stresses plants. Too much drowns roots. Inconsistent watering — the worst offender — causes cracking, blossom end rot, and split fruit.
The Watering Rule
Tomatoes need about 1-2 inches of water per week, delivered as deep, infrequent soakings rather than daily sprinkles. In practice: water deeply 2-3 times per week. In hot weather, containers may need daily watering.
Always water at the base of the plant, never overhead. Wet foliage is the single fastest path to fungal disease — blight, leaf spot, and mildew all thrive on wet leaves. A drip irrigation system or soaker hose is the ideal solution. Our drip irrigation guide covers setup for under $50.
Mulching: Your Tomato’s Best Friend
Apply a 3-4 inch layer of straw, shredded leaves, or wood chips around (not touching) tomato stems after plants are established. Mulch does three critical things: retains moisture between waterings, prevents soil-borne disease spores from splashing onto lower leaves during rain, and suppresses weeds that compete for water and nutrients.
I genuinely believe heavy mulching is the single most underrated tomato-growing technique. The year I started mulching my tomatoes with 4 inches of straw, blight almost disappeared from my garden. Coincidence? My experience — and the research from university extension programs — says no.
Feeding Schedule
Tomatoes are heavy feeders. Start with compost-enriched soil, then side-dress with balanced organic fertilizer (5-5-5) when plants begin setting fruit. A tomato-specific fertilizer with extra calcium helps prevent blossom end rot. Feed every 2-3 weeks during active production.
Pruning and Training for Maximum Harvest
Pruning is where most beginners either do too much or nothing at all. The right approach depends entirely on whether you’re growing determinate or indeterminate varieties.
For Indeterminate (Vining) Tomatoes
Remove suckers regularly. Suckers are the small shoots that grow in the “armpit” between the main stem and a side branch. Left alone, each sucker becomes a new vine — creating a tangled, disease-prone jungle. Pinch or snap them off when they’re small (under 4 inches). Keep 1-3 main stems and remove the rest.
Prune lower foliage. Once your plant reaches about 3 feet tall, remove all leaves from the bottom 12 inches of the stem. This prevents soil splash from carrying disease spores to the leaves — the number one cause of early blight in home gardens.
Top the plant 4-6 weeks before your first expected fall frost. Cut the very top growing point off each stem. This stops new growth and redirects the plant’s energy into ripening existing fruit before cold weather arrives.
For Determinate (Bush) Tomatoes
Minimal pruning. Remove suckers below the first flower cluster, but leave the rest. Determinate plants are genetically programmed to grow to a set size and produce fruit on their side branches — heavy pruning actually reduces your harvest.
Do still remove the bottom 8-10 inches of foliage for disease prevention. This applies to all tomatoes regardless of type.
Solving the 8 Most Common Tomato Problems
Every tomato grower encounters problems. Here’s your field guide to identifying and fixing the issues that show up most often in home gardens.
| Problem | Symptoms | Cause | Solution |
|---|---|---|---|
| Blossom End Rot | Black, leathery patch on bottom of fruit | Calcium uptake disrupted by inconsistent watering | Water consistently; mulch heavily; add calcium amendment |
| Early Blight | Brown spots with concentric rings on lower leaves | Fungal (Alternaria); splashed from soil | Remove lower leaves; mulch; avoid overhead watering |
| Late Blight | Large, greasy-looking spots; white mold underneath | Fungal (Phytophthora); spreads in wet, cool weather | Remove affected plants immediately; copper spray preventatively |
| Cracking/Splitting | Cracks radiating from stem or circling fruit | Rapid water uptake after dry spell | Water consistently; harvest before heavy rain if near-ripe |
| Hornworms | Massive defoliation; large green caterpillars | Manduca moth larvae | Hand-pick; plant basil nearby; attract parasitic wasps |
| Blossom Drop | Flowers form but fall off without setting fruit | Night temps above 75°F or below 55°F | Wait for temps to moderate; shade cloth in extreme heat |
| Yellowing Leaves (bottom) | Lower leaves turn yellow progressively upward | Normal aging OR nitrogen deficiency | If widespread, side-dress with balanced fertilizer; prune yellowed leaves |
| Cat-Facing | Misshapen, scarred fruit with deep creases | Cold temperatures during pollination | Wait to plant until soil and air are reliably warm |
Most of these problems share the same prevention: consistent watering, good mulching, proper pruning of lower foliage, and crop rotation. If you do those four things well, you’ll avoid the vast majority of tomato headaches.
Best Companion Plants for Tomatoes
Tomatoes benefit enormously from the right neighbors. Our full companion planting guide covers the science in depth, but here’s the tomato-specific cheat sheet:
Basil — The number one companion. Research confirms it repels thrips and disorients hornworm moths through scent masking. Plant it 12-18 inches from tomato stems. Let some plants flower for maximum pollinator benefit.
Marigolds — French marigolds suppress root-knot nematodes in the soil and repel whiteflies above ground. Ring your tomato bed with marigolds — they’re cheap, cheerful, and genuinely effective.
Garlic and chives — Alliums repel aphids with their sulfur compounds. Tuck a few garlic cloves or chive plants between your tomato plants for a natural pest deterrent that doubles as a kitchen ingredient.
Carrots — Their deep roots don’t compete with tomato roots for space, and they grow happily in the dappled shade cast by tomato foliage. A good space-sharing partner, though the direct growth benefit is modest.
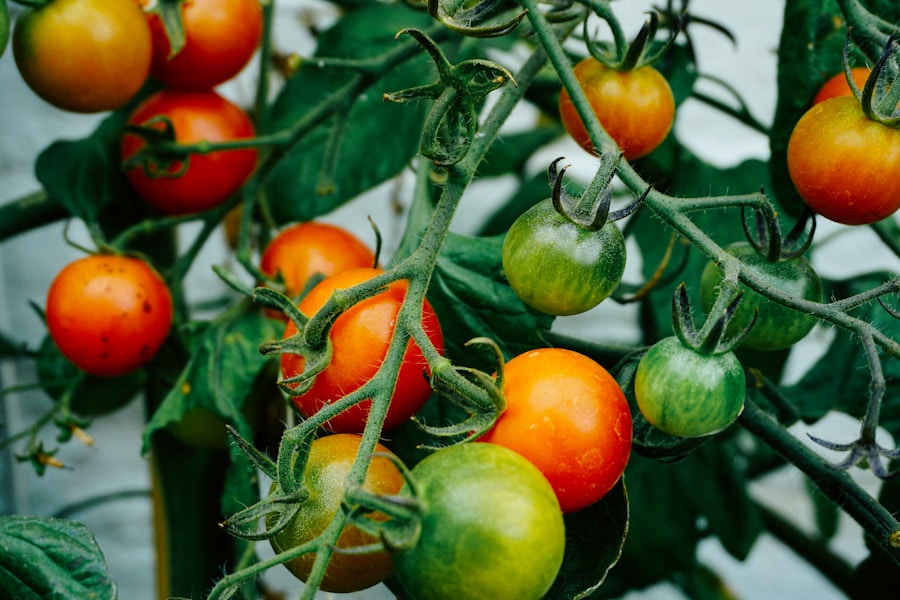
Harvesting, Storing, and Preserving
A perfectly ripe homegrown tomato is a completely different experience from anything you’ll find in a grocery store. The trick is knowing when — and how — to pick.
When to Harvest
Tomatoes are ripe when they’re fully colored, slightly soft when gently squeezed, and release easily from the vine with a gentle twist. Cherry tomatoes often crack or split if left too long after ripening — check daily and pick as soon as they’re full-colored.
If frost threatens and you still have green tomatoes on the vine, pick them and ripen indoors. Place green tomatoes in a single layer in a warm room (65-75°F). Adding a banana to the container speeds ripening by releasing ethylene gas. They won’t taste quite as good as vine-ripened, but they’re far better than letting them freeze.
Storing Fresh Tomatoes
Never refrigerate fresh garden tomatoes. Cold temperatures destroy the volatile compounds that give tomatoes their complex flavor and make the texture mealy. Store at room temperature and eat within 5-7 days of picking. If you’re drowning in tomatoes (a good problem), it’s time to preserve.
Preserving Your Harvest
Freezing: The simplest method. Core fresh tomatoes, place them whole on a baking sheet, freeze until solid, then transfer to freezer bags. The skins slip off when they thaw. Perfect for winter soups and sauces.
Canning: Paste varieties like ‘Roma’ and ‘San Marzano’ make the best canned sauces and whole tomatoes. Follow tested recipes from trusted sources for safe water-bath or pressure canning.
Drying: Slice cherry or grape tomatoes in half and dehydrate at 135°F for 8-12 hours. Store in airtight containers. Sun-dried tomatoes from your own garden — ridiculous flavor.
The Complete Tomato Growing Timeline
Here’s the full journey from seed to sauce, mapped out week by week. Adjust based on your local last frost date (marked as “LFD” below).
6-8 Weeks Before LFD — Start Seeds Indoors
Plant seeds ¼” deep in seed-starting mix. Keep warm (75-85°F). Provide 14-16 hours of bright light after germination. Transplant to larger pots after first true leaves appear.
1-2 Weeks Before LFD — Harden Off Seedlings
Gradually expose seedlings to outdoor conditions over 7-10 days. Start with 2 hours of shade, increasing sun and time daily. Prep your garden beds by working in compost.
After LFD (Soil 60°F+) — Transplant Outdoors
Bury stems deep. Install supports. Water thoroughly. Space 24-48″ apart depending on variety. Apply 3-4 inches of mulch after 2 weeks.
Weeks 2-6 After Transplanting — Establish and Grow
Water consistently (1-2″ per week). Begin sucker removal on indeterminate types. Side-dress with compost or fertilizer when first flowers appear. Watch for early pest signs.
Weeks 6-10 — Flowering and Fruit Set
Green tomatoes appear and start growing. Continue regular watering, feeding, and pruning. Remove lower foliage. Prune bottom 12″ of leaves for disease prevention.
Weeks 10-16+ — Harvest Season
Pick tomatoes as they ripen. Harvest daily for cherries. Side-dress heavy producers every 2-3 weeks. Top indeterminate plants 4-6 weeks before first fall frost.
First Frost Approaching — End of Season
Pick all remaining fruit (green included). Ripen green tomatoes indoors. Remove and compost disease-free plant debris. Note what worked for next year’s plan.
Grow Your Best Tomatoes This Year
Growing great tomatoes comes down to five fundamentals: sun, soil, water, support, and pruning. Get those right and the rest is just fine-tuning.
Start with 2-3 varieties this season — a cherry type for fresh eating, a slicer for sandwiches, and a paste type if you love cooking. Plant them in compost-enriched soil with full sun. Water consistently at the base. Mulch heavily. Prune suckers on indeterminate types. Surround them with basil and marigolds.
Do those things and you’ll harvest more tomatoes than you can eat — which is exactly the problem every gardener hopes for.
🍅 Build Your Complete Garden Around Tomatoes
📦 Raised Garden Beds Guide — the perfect home for tomatoes
🌻 Companion Planting Chart — what to grow alongside your tomatoes
🪱 Composting Guide — feed your soil, feed your plants
🥬 Complete Vegetable Garden Guide — everything else you need to know
Frequently Asked Questions About Growing Tomatoes
How many tomato plants do I need for a family?
For a family of four, 4-6 plants provide plenty for fresh eating throughout the season. If you plan to can sauces or salsa, add 6-10 paste-type plants. One cherry tomato plant alone can produce 200+ fruits — so a single ‘Sun Gold’ or ‘Sweet 100’ handles all your snacking needs for the entire summer.
Can I grow tomatoes in containers?
Yes — with some adjustments. Use containers that hold at least 5 gallons (a 5-gallon bucket with drainage holes works perfectly). Fill with quality potting mix, not garden soil. Choose compact determinate varieties or cherry types. Water daily in summer since containers dry out much faster than garden beds. One plant per pot is ideal — crowding in containers guarantees problems.
Why are my tomato leaves turning yellow?
Yellow leaves on the bottom of the plant are often normal — older leaves die off as the plant redirects energy to new growth and fruit production. If yellowing spreads upward rapidly, it may indicate nitrogen deficiency (add balanced fertilizer), overwatering (check drainage), or early blight (remove affected leaves, improve air circulation). A soil test helps pinpoint nutrient issues.
What causes blossom end rot and how do I prevent it?
Blossom end rot — the black, leathery patch on the bottom of tomatoes — is caused by inconsistent calcium uptake, almost always triggered by irregular watering rather than actual calcium deficiency in the soil. The fix is consistent, deep watering (never letting soil go from dry to soaked) and heavy mulching to stabilize soil moisture. Adding calcium amendments helps, but fixing your watering habit matters more.
When should I start tomato seeds indoors?
Start seeds 6-8 weeks before your last expected frost date. For most of the continental U.S., this means mid-February through mid-April depending on your zone. Starting earlier produces leggy, root-bound seedlings that struggle after transplanting. Use a seed-starting calendar specific to your ZIP code — the Old Farmer’s Almanac tool is excellent for this.
Should I prune tomato suckers?
For indeterminate (vining) varieties: yes. Removing suckers channels the plant’s energy into fewer, stronger stems that produce more and larger fruit. Keep 1-3 main stems and pinch off the rest when small. For determinate (bush) varieties: minimal pruning only. Remove suckers below the first flower cluster but leave the rest — heavy pruning on determinate types reduces your harvest.