Container Vegetable Gardening: How to Grow Real Food in Pots, Buckets, and Tiny Spaces
No yard? No problem. A sunny balcony, patio, doorstep, or even a windowsill is all you need to grow fresh tomatoes, herbs, peppers, salad greens, and dozens of other vegetables in containers. This is how to do it right.
🌱 What This Guide Covers
- Container size matters more than anything. A tomato in a 5-gallon pot produces a fraction of what the same tomato produces in a 10-gallon pot. We give you the exact minimum pot size for 20 vegetables — the detail most guides skip.
- Garden soil from the ground will kill container plants. Containers need a specific, lightweight potting mix with the right balance of drainage and moisture retention. We cover exactly what to use and what to avoid.
- Watering containers is fundamentally different from watering in-ground gardens. Pots dry out 3-5x faster, nutrients wash out with every watering, and the consequences of a single missed day are more severe. The watering section alone can save an entire season.
- You can grow a productive, diverse vegetable garden in as little as 40 square feet of balcony or patio space — enough for tomatoes, peppers, herbs, lettuce, beans, cucumbers, and strawberries simultaneously.
- This guide covers everything from pot selection to soil mixing to crop-by-crop growing instructions to troubleshooting the specific problems container gardens face that in-ground gardens don’t.

I grew my first vegetable in a pasta pot. Not a special gardening container — an actual stainless steel pasta pot with holes drilled in the bottom, sitting on my apartment fire escape in Brooklyn. I planted a single cherry tomato seedling in it with potting soil from the corner bodega, watered it from a plastic water bottle, and hoped for the best.
That ridiculous setup produced over fifty cherry tomatoes between July and October. Fifty. From a pasta pot on a fire escape. They were small, imperfect, and exactly one variety. But they were also the best tomatoes I’d ever eaten — not because they were objectively superior to farmers’ market tomatoes, but because I’d grown them myself in a space I’d assumed was useless for anything resembling agriculture.
That single pasta pot changed my entire relationship with food growing. If one pot on a fire escape could produce fifty tomatoes, what could I do with an actual balcony? A patio? A doorstep that gets six hours of sun? The answer, I learned over the next several seasons of increasingly ambitious container gardening, is: quite a lot more than most people imagine.
Container gardening isn’t a consolation prize for people without yards. It’s a legitimate, productive, and in some ways superior approach to growing food. Containers let you control soil quality perfectly (no inherited clay or sand to deal with). They let you move plants to follow the sun or escape a frost. They eliminate ground-dwelling pests and most soil-borne diseases. They make gardening accessible to renters, apartment dwellers, people with physical limitations, and anyone who’d rather grow food on a patio than maintain a full landscape.
This guide covers everything you need to grow a genuinely productive container vegetable garden — not a token herb pot on the windowsill, but a real food-producing system that contributes meaningfully to your kitchen. The difference between a thriving container garden and a disappointing one comes down to a few specific decisions about pot size, soil, watering, and feeding. Get those right, and containers are one of the most rewarding ways to grow food.
What’s Inside
- Why Container Gardens Succeed (or Fail)
- Choosing Containers: Size, Material, Drainage
- The Perfect Container Soil Mix
- 20 Best Vegetables for Containers
- Watering Containers: The #1 Challenge
- Feeding Container Plants
- Sunlight Requirements and Placement
- Balcony and Patio Specific Advice
- Extending Your Container Season
- 10 Container Gardening Mistakes
- Frequently Asked Questions
Why Container Gardens Succeed — or Fail
Container gardening fails for predictable, fixable reasons. Understanding them upfront saves you from the frustration that makes many people abandon containers after a single disappointing season.
The first and most common reason for failure is pots that are too small. This single mistake causes more container garden disappointment than every other factor combined. A tomato plant in a 2-gallon pot will survive, technically, but it will produce a handful of small, stressed fruit. The same variety in a 10-gallon container will produce dozens of full-sized tomatoes. The roots have space to develop, the soil volume holds enough moisture to survive a hot afternoon, and there’s enough growing medium to supply nutrients throughout the season. If you take nothing else from this guide, remember this: when in doubt about pot size, go bigger. Always bigger.
The second reason is using garden soil in containers. This seems logical — soil is soil, right? — but it’s devastating in practice. Garden soil compacts in containers, becoming dense and airless. It holds too much water after rain and not enough during dry spells. It brings soil-borne diseases and weed seeds into a clean environment. And because it lacks the structural amendments that container mixes include, roots struggle to penetrate it. Container growing requires a purpose-made potting mix, and the difference between proper container mix and scooped-up garden soil is the difference between a productive garden and a slow-motion plant funeral.
The third reason is inconsistent watering. In-ground gardens have a massive buffer of surrounding soil to moderate moisture levels. Containers have nothing — the small volume of soil they contain is all the moisture reservoir the plant has. A 5-gallon pot in full summer sun can go from saturated to dangerously dry in a single afternoon. Container gardening demands more frequent attention to watering than any other growing method, and the plants respond immediately and dramatically to both neglect and excess. Our complete watering guide covers the principles; this section covers the container-specific details.
The good news: once you get these three fundamentals right — appropriate pot size, proper soil mix, and consistent watering — container gardening becomes remarkably straightforward. Containers eliminate many of the challenges that make in-ground gardening complicated: no weeding (or nearly none), no soil amendment struggles, no gopher damage, minimal pest pressure, and perfect drainage. The learning curve is real but short. Most container gardeners hit their stride by the second season.
Choosing Containers: Size, Material, and Drainage
Every container decision starts with size. The minimum pot size for any vegetable is determined by its root system — a plant with deep, spreading roots needs more soil volume than a shallow-rooted crop. Most gardening guides drastically underestimate the pot sizes that vegetables actually need to thrive (not just survive). The chart below shows the real minimum sizes — the smallest containers that still produce a worthwhile harvest.
Lettuce, spinach, radishes, green onions, herbs (basil, cilantro, parsley, mint)
Peppers, eggplant, bush beans, chard, kale, strawberries, single cucumber
Tomatoes (determinate), potatoes, large peppers, bush zucchini
Tomatoes (indeterminate), cucumbers (trellised), full-sized squash
Full-sized squash, melons, corn (multiple stalks), large indeterminate tomatoes
Grow bags acting as mini raised beds. Multiple plants, succession planting, root crops.
These sizes represent functional minimums — the point below which yield drops so dramatically that the effort isn’t worth it. Bigger is always better. A tomato in a 15-gallon container produces meaningfully more than one in a 10-gallon container. If space and budget allow, upsizing by one category from the minimum consistently pays off in harvest volume. The University of Minnesota Extension recommends at least 5 gallons for most vegetables and 10-20 gallons for larger crops — and that’s for adequate production, not maximum yield.
Container Materials Compared
Terracotta / Clay: Beautiful, breathable, heavy enough to resist wind. But porous walls wick moisture from the soil, meaning faster drying. Terracotta containers need more frequent watering than plastic. They also crack in freezing temperatures, so they’re seasonal unless you bring them indoors. Best for Mediterranean herbs like rosemary and thyme that prefer drier conditions.
Plastic / Resin: Lightweight, inexpensive, retains moisture well. Doesn’t breathe like terracotta, which reduces watering frequency but can increase root temperature in dark-colored pots under direct sun. Choose light-colored plastic to reflect heat, or insulate dark pots by double-potting (placing the plastic pot inside a larger decorative container with an air gap). The most practical choice for vegetables.
Fabric Grow Bags: The quiet revolution in container gardening. Fabric bags breathe from all sides, providing excellent root aeration. When roots reach the fabric wall, they’re “air-pruned” — they stop growing outward and branch laterally instead, creating a dense, efficient root system without circling. Fabric bags fold flat for storage, weigh almost nothing, and cost less than rigid containers. The trade-off: they dry out faster than plastic (though slower than terracotta) and need more frequent watering. For vegetables specifically, fabric grow bags in the 7-15 gallon range are arguably the best container option available.
Wood: Natural look, good insulation, breathable. Cedar and redwood resist rot without treatment. Avoid pressure-treated lumber for food growing — the chemicals can leach into soil. Wooden half-barrels (from wine or whiskey barrel makers) are excellent large containers for multiple plants but heavy when filled. Check that wooden containers have adequate drainage holes.
Five-gallon buckets: The working-class hero of container gardening. Food-grade 5-gallon buckets (available from bakeries, restaurants, or home improvement stores for $2-$5) are perfectly sized for peppers, eggplant, and compact tomato varieties. Drill five to eight ½-inch drainage holes in the bottom, and you have a functional, cheap, easily replaceable container. They’re not beautiful, but they work outstandingly well, and you can paint or wrap them if aesthetics matter.
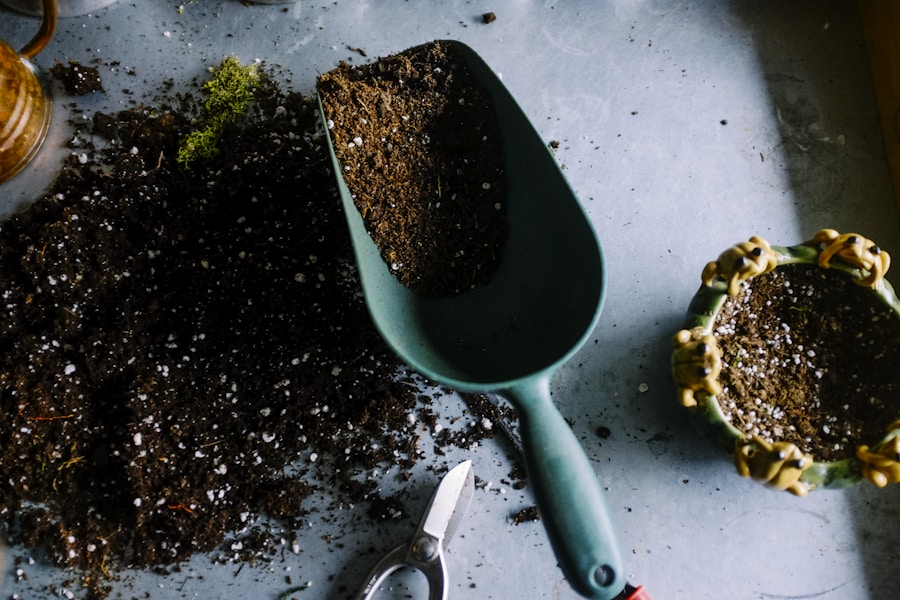
The Perfect Container Soil Mix
Container soil is not the same as garden soil, and this distinction matters more than almost any other factor in container gardening success. The Oregon State University Extension emphasizes that containers need a growing medium that’s lighter, more porous, and better-draining than anything you’d use in the ground — because the physics of water movement in a small, enclosed volume are fundamentally different from in open soil.
Garden soil in a container compacts under its own weight and the pressure of repeated watering. Compacted soil in a pot becomes nearly impenetrable to roots, holds water unevenly (soggy in some spots, dry in others), and lacks the air pores that roots need to breathe. A plant in compacted garden soil slowly suffocates, and no amount of fertilizer or attention can compensate for the fundamental problem of a growing medium that doesn’t allow root function.
A proper container potting mix has three components, each serving a specific purpose:
Peat moss or coconut coir (40-50%): This is the moisture-holding component. Both peat moss and coir are spongy, lightweight materials that absorb many times their weight in water and release it slowly to plant roots. Coir is more environmentally sustainable (peat bogs regenerate very slowly) and has increasingly become the preferred option. Either works well. This component ensures the mix retains enough moisture to sustain plants between waterings.
Perlite or vermiculite (25-35%): This is the drainage and aeration component. Perlite (the white, popcorn-like volcanic glass) creates air pockets throughout the mix that prevent compaction and allow roots to breathe. It also improves drainage — excess water flows through perlite channels rather than pooling. Vermiculite holds slightly more moisture than perlite and is better for moisture-loving crops. For most vegetable containers, perlite is the standard choice.
Compost (20-30%): This is the nutrition component. Finished compost provides slow-release nutrients, beneficial microorganisms, and additional water-holding capacity. It also gives the mix the biological life that pure peat and perlite lack. Without compost, you’re growing in a sterile medium that provides structure but no food — you’d need to supply all nutrition through liquid fertilizer.
The DIY mix is simple: roughly equal parts coir (or peat), perlite, and compost. Adjust based on your climate — more perlite in humid regions (better drainage), more coir in arid regions (better water retention). This mix costs significantly less than pre-bagged potting soil when you buy components in bulk, and you can customize it for specific crops. Commercial potting mixes are perfectly fine if you prefer convenience — just ensure they’re labeled for containers (not “garden soil” or “topsoil,” which compact terribly in pots).
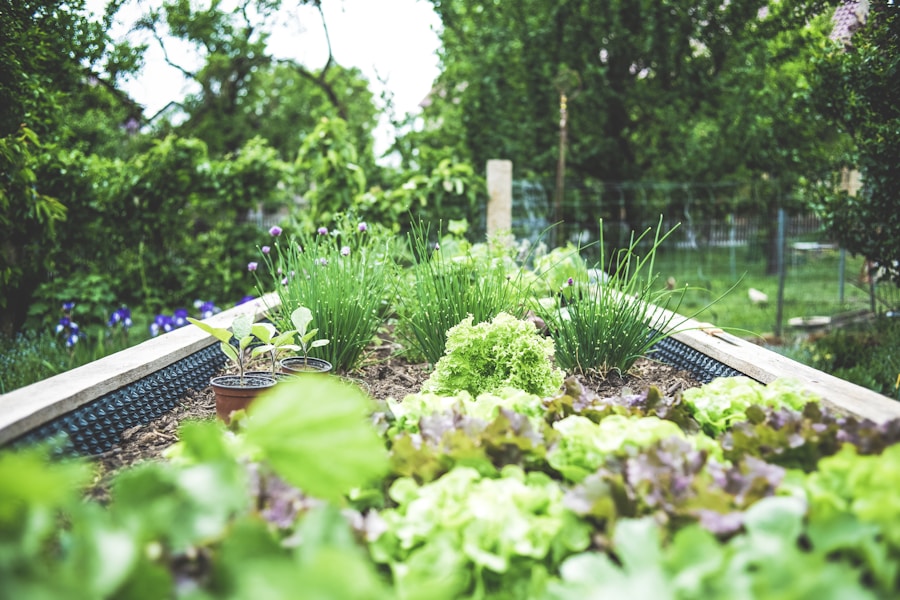
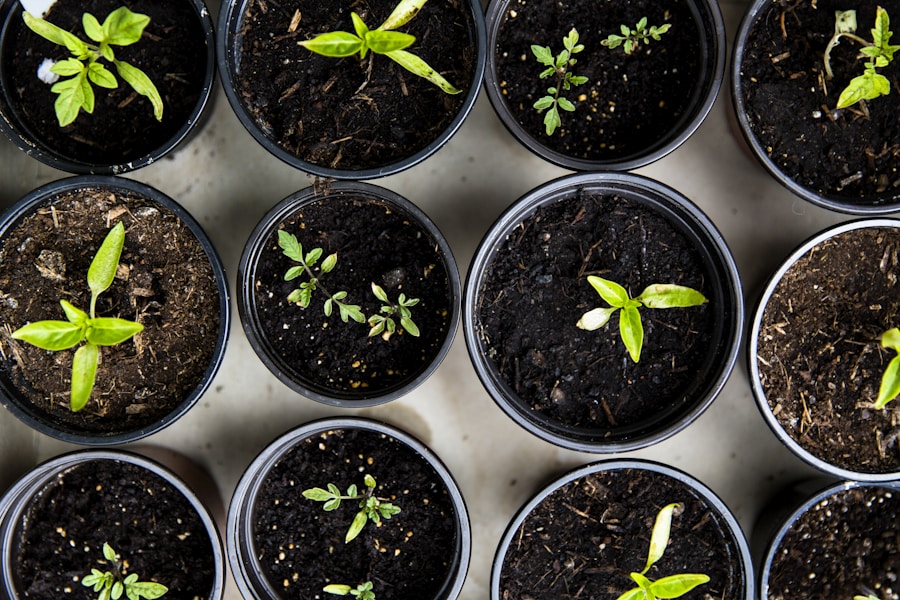
The 20 Best Vegetables for Containers
Not every vegetable grows well in containers. Some need more root space than any reasonable pot provides. Others, however, are not just suitable for containers — they actually thrive in them, producing as well or even better than their in-ground counterparts because containers offer perfect drainage, warm soil, and zero competition from neighboring plants.
The crops below are organized by how well they perform in containers, from “born for it” to “possible with the right setup.” For each, the pot size listed is the genuine minimum for a productive plant — smaller containers will produce proportionally less.
| Vegetable | Min. Pot Size | Sun Need | Days to Harvest | Container Notes |
|---|---|---|---|---|
| Cherry Tomatoes | 5 gal | 8+ hrs | 60-70 | Best container tomato. ‘Tiny Tim’, ‘Tumbling Tom’, ‘Patio Princess’. Cage or stake required. |
| Full-Size Tomatoes | 10-15 gal | 8+ hrs | 70-85 | Determinate varieties easier. ‘Bush Early Girl’, ‘Patio’. Indeterminates need 15+ gal and strong support. |
| Peppers (all types) | 5 gal | 6-8 hrs | 60-90 | Excellent container crop. Compact habit, productive. Hot peppers especially well-suited to pots. |
| Lettuce / Salad Greens | 2-3 gal | 4-6 hrs | 30-50 | Perfect starter crop. Cut-and-come-again varieties produce for months. Tolerates partial shade. |
| Herbs (basil, cilantro) | 2-3 gal | 6+ hrs | Ongoing | The #1 container success story. Multiple plants per pot. Harvest daily for continuous production. |
| Herbs (rosemary, thyme) | 3-5 gal | 6+ hrs | Ongoing | Prefer terracotta (drier). Overwinter indoors near bright window. One plant per pot is sufficient. |
| Green Onions / Scallions | 2 gal | 4-6 hrs | 50-65 | Can regrow from kitchen scraps. Dense planting (½” apart). Virtually foolproof in containers. |
| Radishes | 2-3 gal | 4-6 hrs | 22-30 | Fastest harvest of any vegetable. Succession sow every 10 days for continuous supply. |
| Bush Beans | 3-5 gal | 6-8 hrs | 50-60 | Compact bush varieties ideal. Plant 4-6 seeds per 5-gallon pot. No trellis needed. |
| Spinach | 2-3 gal | 4-6 hrs | 40-50 | Cool-season hero. Grows in partial shade. Multiple succession plantings spring and fall. |
| Kale | 3-5 gal | 4-6 hrs | 55-65 | Ornamental AND edible. ‘Lacinato’ and ‘Red Russian’ are beautiful container plants. Harvest outer leaves. |
| Strawberries | 3 gal (each) | 6-8 hrs | Varies | Perfect for hanging baskets, railing planters. Everbearing types produce all season. 3 plants per pot. |
| Cucumbers | 5-7 gal | 6-8 hrs | 50-70 | Compact/bush varieties. ‘Spacemaster’, ‘Patio Snacker’. Provide small trellis in pot. |
| Eggplant | 5-7 gal | 6-8 hrs | 70-85 | Beautiful ornamental value. ‘Fairy Tale’, ‘Hansel’ are compact. Stake for support. |
| Swiss Chard | 3-5 gal | 4-6 hrs | 55-65 | Gorgeous colors. ‘Bright Lights’ is stunning in decorative pots. Cut-and-come-again harvest. |
| Potatoes | 10+ gal | 6-8 hrs | 70-120 | Grow bags work beautifully for potatoes — fill progressively as plants grow. Fun to harvest. |
| Carrots | 5 gal (12″+ deep) | 6-8 hrs | 60-80 | Short varieties only: ‘Parisian’, ‘Thumbelina’, ‘Little Finger’. Container must be at least 12″ deep. |
| Beets | 5 gal | 4-6 hrs | 50-65 | Both root and greens are edible — double value. Space 3″ apart. Deep container (10″+) for round roots. |
| Peas (snap/snow) | 3-5 gal | 6-8 hrs | 55-70 | Dwarf varieties: ‘Sugar Ann’, ‘Tom Thumb’. Provide small trellis or stick support. Cool-season crop. |
| Zucchini (bush type) | 10+ gal | 6-8 hrs | 45-55 | Only bush varieties: ‘Patio Star’, ‘Astia’. One plant per large container. Very productive. |
The theme across all these recommendations is clear: choose compact, bush, dwarf, or patio-bred varieties. Seed catalogs and garden centers label container-suitable varieties, but reading the mature plant size on the seed packet tells you what you need to know. A variety that grows 24 inches tall and 18 inches wide is a container candidate. One that grows 6 feet tall with sprawling vines is not — unless you have an enormous container and a sturdy trellis system.
If you’re choosing your first container vegetable, start with herbs and salad greens. They’re nearly foolproof, produce quickly (lettuce in 30 days, basil continuously), require the smallest pots, and provide immediate kitchen-usable harvests that build confidence for expanding into more demanding crops like tomatoes and peppers. The University of Maryland Extension recommends this staged approach — starting simple, then scaling up as you learn your space’s microclimate.

Watering Containers: The Number One Challenge
If container gardening has a fatal flaw, this is it. Containers dry out staggeringly fast compared to in-ground gardens. A 5-gallon pot in full summer sun can lose most of its available moisture in a single afternoon. A raised bed in the same conditions might stay moist for three to four days between waterings. This means container gardens demand more frequent watering attention than any other growing method — and the consequences of forgetting are swift and severe.
The physics are straightforward: a container has a tiny volume of soil relative to the plant it’s supporting, and that soil is exposed to air, sun, and wind on all sides (top, and through the pot walls and bottom). An in-ground plant’s root zone extends into the vast surrounding earth, which acts as a thermal and moisture buffer. A container plant has no buffer — the pot’s soil volume is everything it has. When that dries out, the plant has nowhere to reach for moisture.
This is why the general watering guide’s “one inch per week” recommendation is nearly useless for containers. Container vegetables in summer often need watering every single day, sometimes twice on hot or windy days. The variables that determine frequency are pot size (smaller dries faster), pot material (terracotta and fabric dry faster than plastic), plant size (bigger plants transpire more water), weather (heat, wind, and low humidity all increase drying), and sun exposure (full sun heats the pot and soil, accelerating evaporation).
The most reliable method for container watering is the weight test. Lift the pot (or tip it slightly) when it’s freshly watered and note how heavy it feels. Check it again when you suspect it needs water. A container that’s significantly lighter than its just-watered weight needs water. With practice, you develop an instinct for this — experienced container gardeners can glance at a pot and know from its weight whether it needs water. This is more reliable than the finger test used for in-ground gardens, because container soil can be dry at the surface while still moist deeper down (or vice versa), and the small volume means conditions change rapidly.
Water until it runs freely from the drainage holes every time you water. This ensures the entire soil column is moistened — not just the top few inches — and also flushes accumulated salts from fertilizers, which can build up and damage roots. Watering “just a little” is worse than not watering at all, because it wets only the surface and draws roots upward instead of encouraging them to fill the entire pot volume.
Feeding Container Plants: Why They Need More Than In-Ground Gardens
Container plants need more fertilizer than in-ground plants for a simple, unavoidable reason: every time you water, nutrients wash out through the drainage holes. In-ground gardens retain nutrients in the vast surrounding soil matrix. Containers lose them constantly. A container plant that isn’t actively fertilized throughout the season will become nutrient-depleted within weeks, even if you started with excellent compost-rich potting mix.
The feeding strategy for containers has two components: slow-release fertilizer mixed into the potting soil at planting time (providing baseline nutrition for 2-3 months) and liquid fertilizer applied every 1-2 weeks during active growth (replacing the nutrients that watering flushes away).
For the base application, mix a granular organic fertilizer (such as an all-purpose 5-5-5 or similar balanced formula) into the potting mix before planting, following the package rate. This provides a steady, slow trickle of nutrition as the granules break down. For the supplemental feeding, use a water-soluble organic fertilizer (fish emulsion, seaweed extract, or a balanced liquid organic formula) diluted to half the package strength, applied every 10-14 days from the time plants begin active growth through the end of the harvest season.
Tomatoes, peppers, and eggplant are heavy feeders that benefit from slightly higher-phosphorus fertilizer once they begin flowering (phosphorus supports fruit development). Leafy greens prefer higher-nitrogen feeding (nitrogen drives leaf growth). Herbs actually prefer lean feeding — too much fertilizer reduces their flavor concentration. This is where the companion planting concept translates to containers: group crops with similar feeding needs in the same pot or in nearby containers so you can tailor nutrition to each group’s requirements.
Sunlight Requirements and Strategic Placement
One of container gardening’s greatest advantages is mobility. Unlike in-ground plantings that are permanently committed to wherever they’re planted, containers can be repositioned to optimize sunlight as conditions change through the season. This flexibility is enormous — it means you can grow sun-loving tomatoes on a patio that only gets direct sun for part of the day by moving them to follow the light.
The general sunlight requirements are straightforward: fruiting crops (tomatoes, peppers, cucumbers, squash, eggplant, beans) need a minimum of 6-8 hours of direct sun daily. Leafy crops (lettuce, spinach, kale, chard, herbs) can produce well with 4-6 hours. Root crops (carrots, beets, radishes) fall in between at 5-7 hours. These minimums are real — a tomato plant in 4 hours of sun will survive but produce minimal, delayed fruit. In 8 hours, the same plant will be laden.
Map your space before buying a single container. On a clear day, note which areas receive direct sun at 9 AM, noon, and 3 PM. Areas that get sun at all three times have 8+ hours of full sun — perfect for fruiting crops. Areas that get morning sun only (until noon or so) have 4-6 hours — suitable for greens and herbs. Areas with only brief afternoon sun or dappled light are limited to shade-tolerant crops like lettuce, mint, and parsley.
Reflected light matters too. A balcony with a white wall behind the containers receives not just direct sun but also reflected light bouncing off the wall, effectively increasing the light intensity beyond what the orientation alone would suggest. Dark walls absorb light; light-colored walls reflect it. South-facing walls in the Northern Hemisphere receive the most sun — a south-facing balcony or patio is the premium growing location for container vegetables.
Balcony and Patio Specific Advice
Balconies and patios present unique challenges that ground-level gardens don’t face: wind exposure, weight limits, water runoff concerns, and limited floor space. Each requires specific solutions that make the difference between a productive elevated garden and a frustrating one.
Wind: This is the number one balcony problem that gardeners underestimate. Wind at height is significantly stronger than at ground level, and it desiccates plants rapidly. A tomato plant on a fifth-floor balcony loses moisture through its leaves far faster than the same plant at ground level. Wind also physically damages plants — snapping stems, shredding leaves, and toppling lightweight containers. Solutions: position containers against walls (wind shadow), use heavy pots or weigh down lightweight ones, install a windbreak (bamboo screen, fabric panel, or trellis with climbing plants), and choose wind-resistant crops for the most exposed positions (rosemary, thyme, peppers, and compact varieties handle wind better than tall, leafy plants).
Weight: Soil, water, and containers are heavy. A 10-gallon pot filled with wet potting mix weighs approximately 60-80 pounds. Ten such containers total 600-800 pounds — potentially exceeding the load capacity of some balconies, especially older construction. Check your building’s structural specifications or consult management before creating a large balcony garden. Position the heaviest containers nearest the building wall (where structural support is greatest) rather than at the railing edge. Consider lightweight alternatives: fabric grow bags weigh less than ceramic or concrete. Perlite-heavy potting mixes weigh less than compost-heavy ones.
Water runoff: Water running from drainage holes onto a neighbor’s balcony below is a real and legitimate concern in apartment buildings. Use saucers under every container to catch runoff. Elevate pots on small stands or “pot feet” so water doesn’t pool under the container and stain the surface. Self-watering containers virtually eliminate runoff because water enters the reservoir from the top and is consumed from below — very little exits the drainage holes.
Space maximization: Think vertically. Vertical growing — trellises in pots, hanging baskets, railing planters, wall-mounted pockets — uses the air space above and around the balcony that floor-level pots don’t touch. A single trellis in a large pot can support pole beans, cucumbers, or peas, producing more food per square foot of floor space than any horizontal arrangement. Hanging baskets of strawberries and cascading cherry tomatoes use zero floor space while producing meaningful harvests.
Extending Your Container Growing Season
Containers have a massive advantage for season extension that in-ground gardens can’t match: you can move them. When frost threatens in fall, roll your tomato pots against the house wall (which radiates stored heat overnight) or move them indoors to a sunny window. In spring, move containers outdoors on warm days and back inside on cold nights — a rolling “hardening off” process that’s impossible with in-ground plantings.
For more structured season extension, a few simple techniques work beautifully with containers. Placing containers on a south-facing wall on a dolly or plant caddy lets you wheel them into a garage or enclosed porch on frost nights. Wrapping containers with bubble wrap or burlap in fall insulates the root zone (container roots are more exposed to cold than in-ground roots because the pot walls offer minimal insulation). Placing a simple cold frame or row cover over a group of containers creates a miniature greenhouse effect that extends the fall harvest by 3-6 weeks.
The planting calendar applies to container gardens just as it does to in-ground gardens — the difference is that containers give you more flexibility to start earlier (move outside on warm days) and finish later (move inside on frost nights). This effectively extends your growing window by 2-4 weeks on each end compared to in-ground plantings in the same zone.
10 Container Gardening Mistakes (and What to Do Instead)
| # | The Mistake | Why It Hurts | The Fix |
|---|---|---|---|
| 1 | Pots too small | Stunted roots → stunted plants → tiny harvest | Use minimum sizes in our guide. When in doubt, go one size up. |
| 2 | Garden soil in containers | Compacts, drains poorly, introduces disease and weeds | Always use potting mix formulated for containers. Never field soil. |
| 3 | No drainage holes | Root rot from waterlogged soil. Kills plants slowly. | Drill holes in any container that doesn’t have them. Non-negotiable. |
| 4 | Inconsistent watering | Blossom end rot, flower drop, cracking, bitter cucumbers | Check daily. Self-watering containers or drip irrigation on timer. |
| 5 | Not fertilizing through the season | Nutrients wash out; plant starves by midsummer | Slow-release at planting + liquid feed every 10-14 days. |
| 6 | Wrong sun exposure | Fruiting crops in shade → no fruit. Lettuce in full sun → bolts. | Map your sun hours. Match crops to available light. |
| 7 | Overcrowding plants | Competition for water, light, nutrients. All plants underperform. | One tomato per 10-gal pot. One pepper per 5-gal pot. Resist the urge to stuff. |
| 8 | Ignoring wind on balconies | Desiccated plants, broken stems, toppled containers | Windbreaks, heavy pots, wind-resistant varieties in exposed spots. |
| 9 | Planting vining varieties in pots | Sprawling vines overwhelm small containers | Choose bush, compact, patio, or dwarf varieties bred for containers. |
| 10 | Skipping mulch | Soil surface dries fast → more watering → more work | 1-2″ of mulch on every container. Reduces watering by 25-30%. |
Your Complete Gardening Resource Library
🥬 Vegetable Garden Guide — the foundation for everything
💧 Watering Guide — watering containers correctly
💧 Drip Irrigation — automate your container watering
🍅 How to Grow Tomatoes — the most popular container crop
🌿 Herb Garden Guide — herbs are perfect for containers
📅 Planting Calendar — when to plant container vegetables
🌍 Soil Improvement — building the perfect container soil mix
🪱 Composting Guide — compost is essential for container mixes
🍂 Mulching Guide — yes, mulch containers too
↗️ Vertical Gardening — maximize container space with trellises
🛡️ Pest Control — containers have fewer pests, but not zero
🌻 Companion Planting — grouping containers by need
📦 Raised Beds — when you’re ready to scale up
🌱 Starting Seeds Indoors — grow your own transplants for containers
🧊 Season Extension — containers are mobile — use it!
🐝 Pollinator Garden — pollinator pots boost container yields
Frequently Asked Questions
What’s the cheapest way to start a container garden?
Five-gallon food-grade buckets ($2-$5 each from restaurants, bakeries, or hardware stores) with holes drilled in the bottom are the most cost-effective containers available. Fill with a homemade potting mix (equal parts cheap peat moss, perlite, and compost — about $15-$20 for enough mix to fill several buckets). Start with the cheapest, highest-return crops: herbs from seed ($2-$3 per packet), lettuce, and radishes. Total cost for a productive four-bucket garden: approximately $30-$40. That first harvest of fresh herbs and salad greens pays for itself in a week of not buying grocery store herbs at $3-$4 per tiny clamshell package.
Can I leave containers outside in winter?
It depends on your zone and the container material. Terracotta and ceramic containers crack when water in the clay freezes and expands — bring these indoors or into a garage before hard frost. Plastic and resin containers generally survive freezing. Fabric grow bags are fine — fold and store them dry. The soil itself can stay outdoors — freezing doesn’t harm potting mix. But plant roots in frozen containers are more vulnerable than in-ground roots because the pot provides no insulation. If you’re growing perennials (strawberries, herbs) in containers, either move them to a protected spot (unheated garage, against a south-facing wall) or insulate the pots by wrapping them with bubble wrap and mulching the surface heavily.
How many containers do I need to actually make a difference in my food supply?
Fewer than you’d think. A focused container garden of 6-10 pots, strategically planted, provides meaningful contributions to a household’s food supply. One 10-gallon tomato pot produces 10-15 pounds of tomatoes per season. Two 5-gallon pepper pots yield 20-30 peppers. Three 3-gallon herb pots supply all the fresh herbs two people can use. Two 3-gallon lettuce pots provide salad greens every week for three months. That’s 8 containers, roughly $100-$150 in total setup cost, producing several hundred dollars’ worth of groceries at retail prices. The economics of container gardening are genuinely favorable, especially for high-value crops like herbs and cherry tomatoes.
Do container vegetables taste different from garden-grown?
In blind taste tests, container-grown vegetables are indistinguishable from in-ground-grown vegetables of the same variety, given equivalent care. The flavor of a tomato is determined by genetics (variety), ripeness at harvest, and growing conditions (sun, water, nutrition) — not whether the roots were in a pot or the ground. Some container gardeners report that their tomatoes taste better than their in-ground tomatoes, likely because container growing allows more precise control of watering and feeding, and because containers warm the root zone earlier in spring, extending the growing season. The University of Minnesota confirms that properly managed container vegetables are nutritionally and flavour-equivalent to field-grown produce.
What can I grow indoors in containers during winter?
Indoors with a bright south-facing window (or supplemental grow lights), you can grow herbs year-round (basil, mint, chives, parsley, oregano), salad greens (lettuce, arugula, spinach, microgreens), green onions, and small hot peppers. Tomatoes and full-sized vegetables generally need more light than a window provides and are better suited to outdoor-only growing unless you invest in a serious grow light setup (which is a worthwhile rabbit hole for enthusiastic gardeners). Microgreens — harvested as tiny seedlings — are the most productive indoor winter crop: ready in 7-14 days, nutritionally dense, and require minimal light and space. A single windowsill tray of microgreens produces harvestable greens weekly.
Should I use saucers under my containers?
Yes, but with a critical caveat: never let containers sit in standing water for more than 30 minutes after watering. Saucers catch runoff (important for balconies and patios to protect surfaces and downstairs neighbors), but a container sitting in a saucer full of water is re-absorbing that water into the root zone — exactly the waterlogged condition that causes root rot. After watering, check saucers and dump any standing water. Elevating pots on small stands or “pot feet” creates an air gap between the pot bottom and the saucer, improving drainage and preventing the pot from sitting in water.