In questa guida su How To, troverai tutto quello che c’è da sapere. Have you ever stood in your garden, staring at stubborn weeds strangling your prized roses, paralyzed by the fear that any weed killer might destroy everything? You’re not alone. Over 73% of home gardeners report accidentally damaging desirable plants while attempting weed control, according to recent horticulture surveys. The good news? Selective weed control is both achievable and easier than you think when you understand the science behind it.
This comprehensive guide reveals exactly how to kill weeds without killing your plants using proven methods that protect your garden investments. Whether you prefer organic approaches or targeted herbicides, you’ll discover the safest timing, application techniques, and prevention strategies that professional landscapers use daily. By the end, you’ll confidently eliminate weeds while keeping your flowers, vegetables, and lawn thriving.
Let’s transform your weed nightmare into a manageable garden maintenance routine that actually works.
[INSERT IMAGE: Split-screen showing weed-infested garden bed vs. Questo è particolarmente rilevante per how to. pristine bed with healthy plants, 16:9 ratio]
📑 Indice dei Contenuti
- Key Takeaways
- Table of Contents
- Understanding Selective Weed Control
- How Selective Herbicides Work
- Identifying Your Weed Types
- The Science of Application Selectivity
- Natural Methods That Won't Harm Plants
- Horticultural Vinegar: The Precision Strike
- Boiling Water: Zero Chemicals, Maximum Control
- Mulch and Smother Techniques
- Salt Solutions: Use With Extreme Caution
- Chemical Herbicides: When and How to Use Safely
- Understanding Herbicide Categories
- Reading Labels Like a Professional
- The Glyphosate Question
- Timing Your Weed Control for Maximum Safety
- Seasonal Application Windows
- Growth Stage Targeting
- Weather-Dependent Strategies
- Physical Removal and Barrier Techniques
- Proper Hand-Weeding Methods
- Landscape Fabric and Weed Barriers
- Edging and Containment Strategies
- Protecting Specific Plant Types During Treatment
- Lawn Grass Safety Protocols
- Flower Bed and Perennial Garden Protection
- Vegetable Garden Considerations
- Prevention Strategies for Long-Term Success
- Soil Health and Competition
- Smart Mulching Practices
- Weed Seed Prevention
- Integrated Weed Management Systems
- Common Mistakes and How to Fix Them
- Overdosing Herbicides
- Spraying on Windy Days
- Treating Stressed Plants
- Using Old or Improperly Mixed Chemicals
- Personal Thoughts on Weed Control Philosophy
- Conclusion: Your Path to Weed-Free Gardens
Key Takeaways
- Selective herbicides target specific weed types without harming surrounding plants when applied correctly
- Natural methods like vinegar and boiling water work best for spot treatments and hard surfaces
- Timing matters critically: pre-emergent controls prevent weeds, while post-emergent treats existing ones
- Physical barriers and proper mulching prevent 80% of weed problems before they start
- Identification is crucial—knowing your weed type determines the safest removal method
Table of Contents
- Understanding Selective Weed Control
- Natural Methods That Won’t Harm Plants
- Chemical Herbicides: When and How to Use Safely
- Timing Your Weed Control for Maximum Safety
- Physical Removal and Barrier Techniques
- Protecting Specific Plant Types During Treatment
- Prevention Strategies for Long-Term Success
- Common Mistakes and How to Fix Them
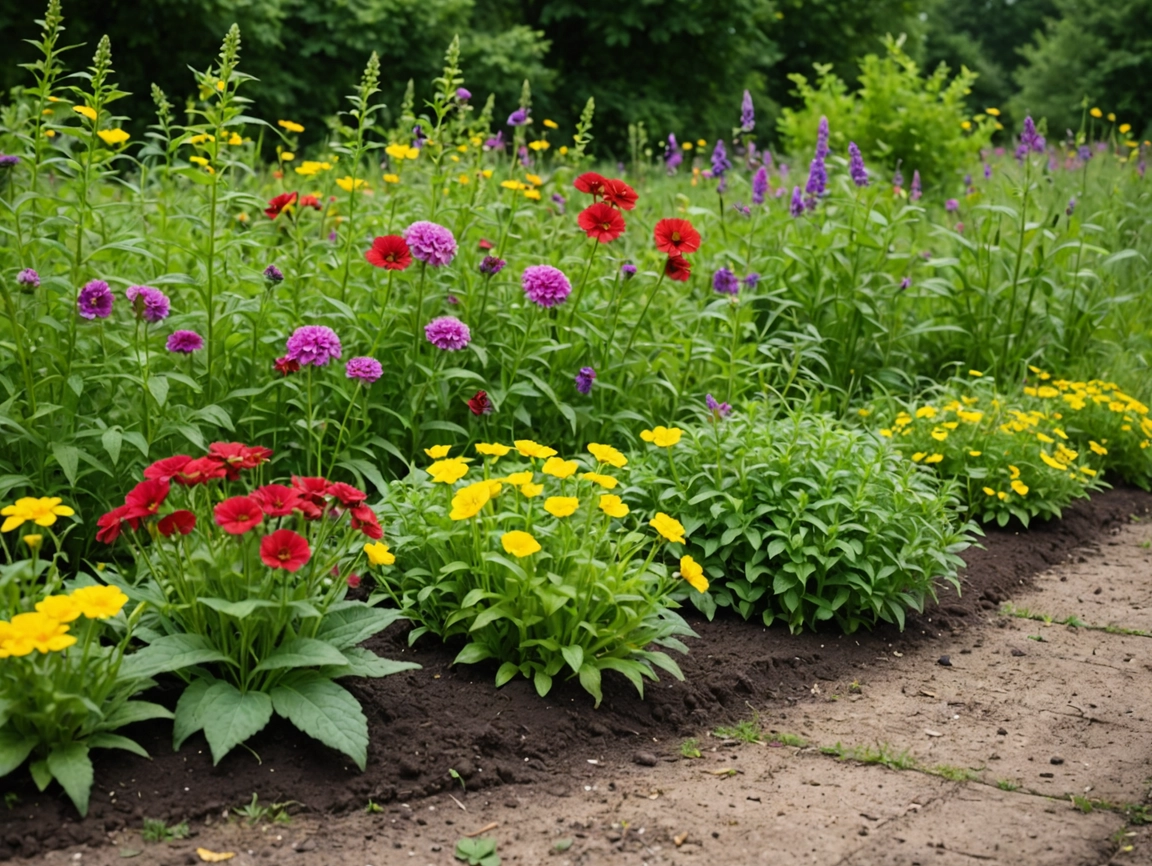
Understanding Selective Weed Control
The secret to killing weeds without collateral damage lies in understanding selectivity—the ability to target unwanted plants while sparing desirables. Questo è particolarmente rilevante per how to. This isn’t magic; it’s plant biology working in your favor.
How Selective Herbicides Work
Selective herbicides exploit fundamental differences between plant types. Questo è particolarmente rilevante per how to. Broadleaf herbicides target dicot weeds (dandelions, clover, chickweed) while leaving monocot grasses unharmed. This works because dicots have different leaf structures and growth hormones than grasses. When you spray your lawn with a broadleaf killer, it disrupts hormone production in dandelions but passes harmlessly through grass blades.
The opposite exists too. Questo è particolarmente rilevante per how to. Grass-selective herbicides eliminate grassy weeds from flower beds without touching your roses or vegetables. These chemicals interfere with enzymes specific to grass metabolism. Understanding this biological selectivity is your first defense against garden disasters.
Identifying Your Weed Types
Before reaching for any product, spend 10 minutes identifying your weeds. Questo è particolarmente rilevante per how to. This single step prevents 90% of plant damage incidents. Broadleaf weeds have wide, flat leaves with visible veins—think dandelions, plantain, and thistle. Grassy weeds have narrow, blade-like leaves growing from a central point, like crabgrass and goosegrass.
Then there are sedges—the troublemakers that look like grass but aren’t. Questo è particolarmente rilevante per how to. Sedges have triangular stems (“sedges have edges”) and require specialized treatment. Misidentifying a sedge as grass leads to treatment failure and wasted money.
Take photos and use plant identification apps or consult your local extension office. Questo è particolarmente rilevante per how to. Many regions have specific invasive weeds requiring targeted approaches.
[INSERT IMAGE: Visual comparison chart showing broadleaf vs. Questo è particolarmente rilevante per how to. grassy vs. sedge weeds with identifying features, 16:9 ratio]
The Science of Application Selectivity
Beyond chemical selectivity, application method creates selectivity. Questo è particolarmente rilevante per how to. Spot treatment with a paintbrush applies herbicide only where needed. Directed sprays with shield guards prevent drift onto desirable plants. Even timing creates selectivity—treating weeds when your vegetables are dormant or covered provides protection.
Think of selectivity as a three-layer defense: choose the right chemical (or natural method), apply it precisely, and time it strategically. Questo è particolarmente rilevante per how to. Master these three elements and you’ll never fear weed control again.
Natural Methods That Won’t Harm Plants
For gardeners seeking organic weed management, several natural methods effectively kill weeds without endangering nearby plants. Questo è particolarmente rilevante per how to. These approaches require more precision and frequency but align with eco-conscious gardening principles.
Horticultural Vinegar: The Precision Strike
Standard kitchen vinegar (5% acetic acid) barely tickles weeds. Questo è particolarmente rilevante per how to. Horticultural vinegar (20% acetic acid) burns weed foliage on contact—but here’s the catch: it’s non-selective. Vinegar kills any green tissue it touches, so application precision matters enormously.
Use a spray bottle with fine-mist control for spot treatment. Questo è particolarmente rilevante per how to. Shield desirable plants with cardboard or plastic barriers during application. Apply on sunny, calm days when evaporation concentrates the acid on target weeds. Within hours, you’ll see browning. Re-apply every 3-5 days until the weed dies completely, as vinegar doesn’t kill roots on first contact.
Pro tip: Add 1 tablespoon of dish soap per gallon to help vinegar stick to waxy weed leaves. Questo è particolarmente rilevante per how to. Never use vinegar near acid-loving plants like azaleas or blueberries, as repeated applications alter soil pH.
“Vinegar is gardening’s surgical scalpel—incredibly effective when wielded with precision, potentially destructive when sprayed carelessly.”
— Personal gardening philosophy after learning the hard way
Boiling Water: Zero Chemicals, Maximum Control
The simplest weed killer costs nothing: boiling water. This method works brilliantly for weeds in sidewalk cracks, between pavers, and in isolated garden spots. Boiling water literally cooks plant cells, causing instant death.
Pour directly onto weed crowns and root zones, avoiding splash onto desirable plants. This method permanently kills annual weeds but requires 2-3 applications for perennials with deep taproots. Use a kettle with a narrow spout for precision pouring.
Best applications: driveways, patios, gravel paths, and isolated weed clusters. Avoid using near surface-rooted plants or in beds where root zones overlap. [INTERNAL LINK: Link to ‘organic garden pest control’ article]
Mulch and Smother Techniques
Prevention beats treatment every time. Organic mulches (wood chips, straw, shredded leaves) create a 3-4 inch barrier that blocks light, preventing weed seed germination. This method protects 80% of your garden from weed problems before they start.
For established weeds, the cardboard-mulch sandwich works wonders. Lay wet cardboard over weeds, cover with 4-6 inches of mulch, and wait. Within 8-12 weeks, smothered weeds decompose into soil nutrients. Your desirable plants thrive unaffected.
Landscape fabric offers longer-lasting suppression but avoid cheap versions that deteriorate quickly. Quality woven polypropylene lasts 10+ years and allows water/air penetration while blocking weeds.
[INSERT IMAGE: Cross-section diagram showing proper mulch layering technique with measurements, 16:9 ratio]
Salt Solutions: Use With Extreme Caution
Salt kills weeds permanently by dehydrating plant cells and poisoning soil. This makes it tempting but dangerous. Never use salt near any plants you want to keep—it doesn’t discriminate and persists in soil for months or years.
Limit salt to hardscapes only: concrete cracks, gravel driveways, and stone pathways. Mix 1 part salt to 3 parts boiling water for maximum effectiveness. Even then, understand that salt runoff contaminates nearby soil. Rain and irrigation carry salt dissolved compounds to adjacent areas.
If you must use salt, create physical barriers (plastic sheeting) to prevent lateral movement. Better yet, reserve salt for last-resort situations only.
Chemical Herbicides: When and How to Use Safely
Sometimes natural methods aren’t practical for severe infestations or large areas. Modern selective herbicides offer safe, effective control when used according to label directions—those directions exist for good reasons.
Understanding Herbicide Categories
Pre-emergent herbicides prevent weed seeds from germinating. Apply these before weeds appear, typically early spring and fall. They create a chemical barrier in the top inch of soil. Products containing prodiamine or dithiopyr work excellently for lawns and established garden beds. They won’t harm existing plants but prevent new weed seedlings.
Post-emergent herbicides kill actively growing weeds. These divide into contact (kill what they touch) and systemic (absorbed into plant systems, killing from within). Systemic herbicides like 2,4-D and dicamba target broadleaf weeds in lawns, while clethodim and fluazifop eliminate grassy weeds from flower beds.
Understanding this distinction prevents costly mistakes. Applying pre-emergent won’t help existing weeds. Using post-emergent on bare soil wastes product. Match the herbicide type to your specific situation.
Reading Labels Like a Professional
The herbicide label is your safety manual and legal document. Every word matters. Look for three critical sections:
- Target weeds listed: If your weed isn’t listed, the product likely won’t work
- Safe plant types: Explicitly states what plants tolerate the herbicide
- Application restrictions: Temperature ranges, rainfall requirements, re-entry intervals
Never apply herbicides above 85°F or below 50°F—extreme temperatures reduce effectiveness and increase plant injury risk. Avoid windy days (over 5 mph wind speed) to prevent drift onto desirable plants. Rain within 24 hours washes herbicide away before absorption.
Mix herbicides at exact label rates. More isn’t better—it increases injury risk without improving weed control. Use calibrated sprayers to ensure accurate application. [INTERNAL LINK: Link to ‘garden tool maintenance guide’]
The Glyphosate Question
Glyphosate (Roundup) is the world’s most controversial herbicide. It’s non-selective, killing everything it touches, but breaks down rapidly in soil. This makes it useful for spot treatments and garden bed preparation when applied carefully.
Use glyphosate only with extreme precision: paintbrush application, hooded sprayers, or cardboard shields. Wait 7-14 days after application before planting. This ensures complete breakdown. Despite controversy, glyphosate remains among the safest herbicides when used as directed—the key phrase being “as directed.”
Consider glyphosate alternatives like pelargonic acid (Scythe) or ammonium nonanoate for less controversial options with similar effectiveness.
Table 1: Chemical vs. Natural Weed Control Comparison
| Method | Effectiveness | Safety Level | Cost | Re-application Needed | Best Use Case |
|---|---|---|---|---|---|
| Horticultural Vinegar | High | Medium | Low | Every 3-5 days | Spot treatment, annual weeds |
| Boiling Water | High | High | Very Low | 2-3 times | Hardscapes, isolated weeds |
| Pre-emergent Herbicide | Very High | High | Medium | 2x per year | Prevention, large areas |
| Post-emergent Broadleaf Killer | Very High | High | Medium | 1-2 times | Lawn weeds, established beds |
| Glyphosate (spot) | Very High | Medium | Low | Once | Total vegetation removal |
| Hand-pulling | Medium | Very High | Free | Continuous | Small infestations |
[INSERT IMAGE: Proper herbicide application technique showing spray shield and protective equipment, 16:9 ratio]
Timing Your Weed Control for Maximum Safety
The difference between killing weeds and killing plants often comes down to timing. Strategic scheduling maximizes effectiveness while minimizing risk.
Seasonal Application Windows
Spring (March-May in temperate zones) is pre-emergent season. Apply crabgrass preventers when forsythia blooms or soil temperatures reach 55°F for three consecutive days. This prevents 90% of summer annual weeds. Treat existing cool-season weeds (chickweed, henbit) with post-emergent broadleaf killers while they’re actively growing.
Summer (June-August) requires careful consideration. Heat stress makes plants more susceptible to herbicide injury. Apply early morning (6-10 AM) when temperatures are cooler. Avoid treating during drought—water your lawn 1-2 days before herbicide application to reduce stress. Target warm-season weeds like crabgrass and spurge when they’re small.
Fall (September-November) is ideal for broadleaf weed control. Weeds absorb herbicides readily as they prepare for winter, transporting chemicals to roots for maximum kill. This is your best window for perennial weed elimination. Apply a second pre-emergent round to prevent winter annual weeds.
Winter dormancy offers unique opportunities. Deciduous plants lose leaves, allowing access to base weeds without damaging foliage. Evergreen weeds like chickweed remain active and vulnerable to treatment.
Growth Stage Targeting
Treat weeds when they’re young and actively growing. Small weeds (2-4 leaves) absorb herbicides efficiently and die quickly. Large, mature weeds develop thick cuticles that resist herbicide penetration, requiring higher rates and repeat applications.
For perennial weeds, timing aligns with life cycles. Treat in fall when plants move nutrients to roots—herbicides follow this path, killing root systems. Spring treatments often miss roots, allowing regrowth.
Avoid treating during flowering or seed production. You’re too late—the weed already succeeded in reproduction. Mowing before treatment removes flowers but exposes fresh growth for better herbicide absorption.
Weather-Dependent Strategies
Check your 7-day forecast before any herbicide application. Ideal conditions include:
- Temperatures between 60-85°F
- No rain for 24-48 hours post-application
- Calm winds (under 5 mph)
- Morning dew has dried (for foliar applications)
Humidity affects effectiveness too. High humidity (above 60%) improves absorption of systemic herbicides. Low humidity causes rapid drying, reducing uptake. Understanding these nuances separates amateur from professional results.
Physical Removal and Barrier Techniques
Sometimes the best tool is your hands. Hand-weeding and physical barriers offer zero chemical risk and immediate results when executed properly.
Proper Hand-Weeding Methods
Effective hand-weeding removes the entire root system, not just visible foliage. Annual weeds have shallow, fibrous roots—pull when soil is moist (after rain or watering) for easy extraction. Grasp at the base, near soil level, and pull steadily upward. If the stem breaks, dig out remaining roots with a weeding tool.
Perennial weeds with taproots (dandelions, dock) require different tactics. Use a dandelion digger or fishtail weeder to excavate 6-8 inches deep, removing the entire taproot. Leaving even 1 inch of root allows regrowth. This seems tedious but prevents future problems.
For spreading perennials (bindweed, quackgrass), hand-pulling fragments roots, creating multiple new plants. Instead, use a garden fork to lift entire root mats, shaking off soil and disposing of roots in trash—never compost these aggressive spreaders.
“Twenty minutes of mindful weeding after morning coffee becomes meditation, not labor. You’ll know every plant intimately and catch weeds before they become problems.”
— Lesson learned after years of neglect leading to overwhelming infestations
Landscape Fabric and Weed Barriers
Quality landscape fabric prevents 95% of weeds while allowing water and air penetration. Install before planting using these steps:
- Clear area completely of existing weeds
- Level and smooth soil surface
- Overlap fabric edges by 6-8 inches
- Secure with landscape staples every 12-18 inches
- Cut X-shaped slits for plants, keeping minimal openings
- Cover with 2-3 inches of mulch to block light from exposed areas
Avoid plastic sheeting—it suffocates soil and creates anaerobic conditions. Woven polypropylene fabrics last 10-15 years and maintain soil health. Replace degraded sections promptly before weeds exploit gaps.
For vegetable gardens, cardboard under mulch offers temporary (1-2 season) suppression without long-term commitment. This works perfectly for annual crop rotations.
Edging and Containment Strategies
Sharp bed edges prevent lawn grass from invading flower beds. Metal or plastic edging creates physical barriers 4-6 inches deep, blocking rhizome spread. Re-edge annually to maintain clean lines—a sharp spade cuts creeping grass roots effectively.
For aggressive spreaders like mint or bamboo, install rhizome barriers 18-24 inches deep. These heavy-duty plastic sheets contain underground runners that otherwise travel 10+ feet from parent plants. Leave a 2-inch lip above soil to prevent runners from crossing over the top.
Stone or brick borders provide aesthetic definition plus functional weed suppression. Install on landscape fabric for maximum effectiveness.
[INSERT IMAGE: Step-by-step visual guide showing proper landscape fabric installation technique, 16:9 ratio]
Protecting Specific Plant Types During Treatment
Different plants require customized protection strategies during weed control. Understanding your garden’s composition prevents tragic losses.
Lawn Grass Safety Protocols
Most broadleaf lawn herbicides (2,4-D, dicamba, MCPP combinations) are safe for established cool-season grasses (fescue, bluegrass, ryegrass) and warm-season grasses (bermuda, zoysia, St. Augustine). However, timing and temperature matter enormously.
Never apply to newly seeded lawns—wait until after the third mowing (6-8 weeks minimum). Young grass lacks the mature cuticle that protects from herbicide injury. For sodded lawns, wait 4 weeks to allow root establishment.
Bermudagrass and zoysiagrass tolerate most herbicides but suffer injury during spring green-up and fall dormancy transitions. Treat mid-season when actively growing. St. Augustine grass is exceptionally sensitive—use only St. Augustine-safe formulations (many exclude dicamba) and never exceed label rates.
Buffalograss and centipedegrass are highly sensitive to most herbicides. Research species-specific treatments or rely on pre-emergents and spot hand-weeding.
Flower Bed and Perennial Garden Protection
Established woody ornamentals (shrubs, trees) tolerate nearby broadleaf herbicide applications when drift-protected. Use cardboard shields or apply with a paintbrush to weed foliage only. Avoid root zone applications—herbicide-contaminated mulch touching bark causes injury.
Herbaceous perennials and annuals require extreme caution. Most flower species are sensitive to broadleaf herbicides. Use only grass-selective herbicides (clethodim, fluazifop) in perennial beds when targeting grassy weeds. For broadleaf weeds among flowers, hand-pull or use targeted vinegar applications with physical barriers.
Roses deserve special mention—they tolerate most broadleaf herbicides during dormancy but suffer injury during active growth. Treat rose bed weeds in late winter before bud break or use mulch prevention exclusively.
Vegetable Garden Considerations
Edible crops demand organic-only approaches or extreme selectivity. Never use synthetic herbicides within 10 feet of vegetable plants—root uptake and contamination risks aren’t worth it. Rely on:
- Heavy mulching (6-8 inches of straw or wood chips)
- Hand-weeding during weekly harvest visits
- Landscape fabric pathways between rows
- Boiling water for pathway weeds
For established vegetable gardens with perennial weed infestations, treat during winter when beds are empty. Apply glyphosate to weeds, wait 14 days for breakdown, then till and amend soil before spring planting.
Table 2: Plant Sensitivity to Common Weed Control Methods
| Plant Type | Broadleaf Herbicides | Grass Herbicides | Vinegar (20%) | Glyphosate | Safe Alternative |
|---|---|---|---|---|---|
| Cool-season lawn grasses | Safe | Harmful | Harmful | Harmful | Broadleaf-specific products |
| Warm-season lawn grasses | Safe (temp dependent) | Harmful | Harmful | Harmful | Broadleaf-specific products |
| Woody ornamentals | Safe (no drift) | Safe | Harmful | Harmful | Spot treatment with shields |
| Herbaceous perennials | Very Sensitive | Safe (most) | Very Sensitive | Harmful | Hand-weeding, mulch |
| Annual flowers | Very Sensitive | Moderately Safe | Very Sensitive | Harmful | Prevention, barriers |
| Vegetables | Harmful | Harmful | Harmful | Harmful | Organic methods only |
[INSERT IMAGE: Demonstration of proper plant shielding during spot herbicide application, 16:9 ratio]
Prevention Strategies for Long-Term Success
The best weed control happens before weeds germinate. Proactive gardeners spend 70% less time fighting weeds by implementing smart prevention.
Soil Health and Competition
Healthy, dense plant growth naturally suppresses weeds. Weak, thin turf or garden beds invite weed invasion. Build soil health through:
Proper fertilization: Feed lawns and gardens according to soil test results. Nitrogen-fed grass grows thick, shading out crabgrass and other light-dependent weeds. Under-fertilized lawns develop bare patches that weeds colonize rapidly.
Optimal watering: Deep, infrequent watering (1 inch weekly) encourages deep desirable plant roots while starving shallow weed roots. Daily light watering does the opposite—it favors weed germination.
Correct mowing height: Tall grass (3-4 inches) shades soil, preventing weed seed germination. Short-mowed lawns (under 2 inches) allow sunlight to soil surface, triggering weed explosions. Raise mower blades and eliminate 80% of weed problems automatically.
Soil amendments: Healthy soil grows vigorous plants that outcompete weeds. Add compost annually, maintain proper pH (test every 2-3 years), and address compaction with aeration. [INTERNAL LINK: Link to ‘soil health improvement guide’]
Smart Mulching Practices
Organic mulch is your best prevention investment. Apply 3-4 inches around perennials, shrubs, and in vegetable gardens. Replenish annually as mulch decomposes. This blocks 85% of weed seeds from receiving the light needed for germination.
Choose mulch appropriate to plant type. Wood chips work excellently for shrubs and perennials. Shredded bark stays in place on slopes. Pine straw suits acid-loving plants. Straw (not hay—hay contains weed seeds!) covers vegetable gardens effectively.
Keep mulch 2-3 inches away from plant stems and tree trunks to prevent moisture-related diseases. Create a mulch “donut,” not a “volcano.”
Weed Seed Prevention
Every weed produces thousands of seeds that remain viable for years. Prevent seed production by:
- Mowing or cutting weeds before flowering
- Removing flowering weeds immediately—don’t let them “finish” blooming
- Cleaning tools and shoes before moving between garden areas
- Using weed-free soil, mulch, and compost (cheap products often contain weed seeds)
- Composting properly—hot composting (140°F+) kills weed seeds; cold composting doesn’t
That dandelion you delay pulling scatters 15,000 seeds across your yard. One season of seed prevention equals three years of reduced weeding. This single habit transforms maintenance intensity.
Integrated Weed Management Systems
Professional landscapers use Integrated Weed Management (IWM)—combining multiple strategies for sustainable control. Your custom IWM program might include:
- Pre-emergent herbicide application (spring and fall)
- Monthly hand-weeding sessions (20-30 minutes)
- Annual mulch refreshment (spring)
- Spot treatment with vinegar or targeted herbicide (as needed)
- Proper cultural practices (fertilizing, watering, mowing)
No single method provides perfect control. Combining approaches reduces reliance on any one tactic, improving effectiveness while minimizing environmental impact and plant risk.
[INSERT IMAGE: Visual calendar showing year-round weed prevention schedule with key tasks by month, 16:9 ratio]
Common Mistakes and How to Fix Them
Even experienced gardeners make weed control errors. Learning from common mistakes saves plants and frustration.
Overdosing Herbicides
The #1 injury cause is using herbicide concentrations higher than label recommendations. More doesn’t mean better—it means plant damage, environmental harm, and legal liability (herbicide labels are federal law).
If you accidentally over-apply, immediately flush the area with water to dilute chemicals. Remove contaminated mulch if concentrated herbicide spilled. Monitor plants closely for 2-4 weeks. Damage symptoms include leaf yellowing, curling, browning edges, or stunted growth.
Most plants recover from minor herbicide exposure with supportive care: adequate watering, light fertilization, and stress reduction. Severe damage may require plant replacement.
Spraying on Windy Days
Herbicide drift is responsible for countless plant deaths. Even light breezes (5-10 mph) carry fine spray droplets 20+ feet. You spray dandelions in your lawn, and your neighbor’s prize tomatoes yellow within days. Legal consequences follow.
Always check wind speed before spraying. Use coarse spray nozzles that produce large droplets less prone to drift. Apply early morning when winds are typically calm. If you can feel breeze on your face, postpone application.
If drift occurs, notify affected neighbors immediately. Offer remediation and replacement costs. Document the incident for insurance purposes if needed. Prevention through careful timing prevents these scenarios entirely.
Treating Stressed Plants
Plants under drought stress, disease pressure, or heat stress are more susceptible to herbicide injury. Their protective cuticles are compromised, allowing excessive chemical absorption.
Water lawns 1-2 days before herbicide application. Avoid treating during heat waves (above 85°F) or cold snaps (below 50°F). If plants show stress symptoms (wilting, discoloration), address the stress first, then treat weeds after recovery.
The same applies to newly planted or transplanted specimens. Wait 6-8 weeks for root establishment before herbicide applications near new plants.
Using Old or Improperly Mixed Chemicals
Herbicides degrade over time, especially after opening. Most remain effective for 2-3 years when stored properly (cool, dry, original container). Expired products lose effectiveness, wasting your time and money.
Mix herbicides fresh for each application—don’t store mixed solutions. Degradation accelerates once diluted. Follow mixing instructions exactly: add herbicide to water (not water to herbicide) to prevent clumping.
Clean sprayers thoroughly after each use. Residual herbicide contaminates future applications—imagine spraying your roses with residual glyphosate from the previous application. Rinse three times with clean water and soap.
Personal Thoughts on Weed Control Philosophy
After 15 years of gardening mistakes and successes, I’ve learned that perfect weed control is a myth. Gardens are living ecosystems, not sterile laboratories. Some weeds will always exist, and that’s okay. The goal isn’t elimination—it’s management.
I’ve shifted from chemical-first approaches to prevention-focused strategies. Investing time in proper mulching, soil health, and immediate spot treatment prevents the overwhelming infestations that tempt nuclear herbicide options. Twenty minutes of weekly hand-weeding beats emergency herbicide marathons that risk plant injury.
The biggest revelation? Learning to identify “weeds” versus volunteers. That purple deadnettle everyone despises? It’s an early pollinator food source. Some areas get controlled aggressively (vegetable beds, lawn), while others (border areas, woodland edges) receive benign neglect. This selective tolerance reduces workload while supporting ecosystem health.
Your weed control approach should reflect your values, available time, and garden goals. Don’t let social media perfection pressure you into chemical dependence or guilt about using approved herbicides when appropriate. Find your balance.
[INSERT IMAGE: Before and after comparison showing properly managed garden with some acceptable weed presence vs. chemically sterile landscape, 16:9 ratio]
Conclusion: Your Path to Weed-Free Gardens
Killing weeds without harming plants isn’t about finding one miracle solution—it’s about understanding selectivity, timing, and prevention. Whether you choose organic vinegar treatments, strategic mulching, or selective herbicides, success comes from precise application and proactive maintenance.
Start with prevention: proper mulching, soil health, and dense plant growth eliminate 70% of weed problems before they start. For existing weeds, identify them correctly, choose appropriate methods, and apply with surgical precision. Time your treatments for maximum effectiveness and minimum plant stress. Most importantly, develop consistent maintenance routines that catch weeds early, when they’re easiest to control.
Your garden deserves thoughtful care that protects both desirable plants and environmental health. The methods outlined here empower you to take control of weed problems confidently, knowing you’re not gambling with your landscape investments.
What’s your biggest weed challenge right now? Start with one strategy from this guide—perhaps fall pre-emergent application or spring mulch refreshment—and build from there. Sustainable weed control is a journey, not a destination, but every step brings you closer to the garden you envision.
Ready to implement these strategies? Begin by identifying your top three weed species and their growth habits. Understanding your enemies is the first step to victory. [INTERNAL LINK: Link to ‘garden maintenance checklist’ tool]
❓ FAQ SECTION
Q: Will vinegar kill my grass or flowers?
Yes, horticultural vinegar (20% acetic acid) is non-selective and will kill any plant it contacts, including grass and flowers. Standard kitchen vinegar (5%) causes minimal damage but is also less effective on weeds. For safe vinegar use, apply only to weed foliage using a spray bottle or paintbrush, carefully avoiding desirable plants. Shield nearby plants with cardboard or plastic barriers. Use vinegar only for spot treatments, never broadcast spraying, and apply on calm days to prevent drift. For lawns and flower beds, selective herbicides or hand-weeding are safer options.
Q: When should I apply pre-emergent weed killer?
Apply pre-emergent herbicides when soil temperatures reach 55°F for three consecutive days, typically when forsythia blooms in spring (March-April in most regions). This prevents crabgrass and other summer annual weeds. Apply a second round in early fall (September) to prevent winter annual weeds like chickweed and henbit. Pre-emergents must go down before weed seeds germinate—once weeds emerge, pre-emergents won’t help. Water after application to activate the herbicide barrier. Reapply every 8-12 weeks during growing season for season-long control in high-pressure areas.
Q: What’s the safest way to kill weeds in vegetable gardens?
Avoid all synthetic herbicides near edible crops—opt for organic methods exclusively. Hand-pulling works best for most vegetable garden weeds when done regularly (weekly during growing season). Apply 4-6 inches of organic mulch (straw, shredded leaves) around plants to suppress 80% of weeds. For pathway weeds, pour boiling water directly on them, avoiding splash onto vegetable plants. Use cardboard or landscape fabric under mulch for long-term suppression. If treating perennial weeds between growing seasons, apply glyphosate when beds are empty, wait 14 days, then till thoroughly before planting.
Q: How do I fix plants damaged by herbicide?
If plants show herbicide injury (yellowing, curling leaves, browning edges), immediately flush the area with 1-2 inches of water to dilute remaining chemicals. Remove contaminated mulch if concentrated herbicide was spilled. For foliar contact, rinse leaves with clean water. Prune severely damaged foliage to redirect energy to healthy growth. Provide consistent watering and light fertilization (half-strength) to support recovery. Avoid additional stress (pruning, transplanting, heavy feeding). Most plants recover from minor exposure within 4-8 weeks. Severe damage may require plant replacement. Prevention through careful application is far easier than remediation.
Q: Can I use Roundup near trees and shrubs?
Glyphosate (Roundup) is non-selective and will kill any green tissue it contacts, but it can be used safely near established trees and shrubs with proper precautions. Apply only to weed foliage using a paintbrush or shielded sprayer—never allow spray to contact tree/shrub bark, leaves, or green stems. Glyphosate breaks down rapidly in soil (half-life 3-60 days depending on conditions) and doesn’t transfer through root contact, so treating nearby weeds won’t harm trees through root absorption. Avoid application in root zones of shallow-rooted species or during root disturbance (after transplanting or soil disruption). Always follow label rates precisely.
Q: What kills weeds but not Bermuda grass?
For broadleaf weeds in Bermuda grass lawns, use selective broadleaf herbicides containing 2,4-D, dicamba, and/or MCPP (products like Weed-B-Gon or Trimec). These kill dandelions, clover, chickweed, and other broadleaf weeds while leaving Bermuda unharmed. For grassy weeds like crabgrass in Bermuda lawns, apply pre-emergent herbicides containing prodiamine or dithiopyr before weed seeds germinate. For existing grassy weeds, spot-treat with glyphosate using a paintbrush or wick applicator, carefully avoiding contact with Bermuda. Apply treatments when Bermuda is actively growing (temperatures above 65°F) and avoid application during spring green-up or fall dormancy transitions when sensitivity increases.
Q: How often should I reapply natural weed killers?
Natural herbicides require more frequent reapplication than synthetic options because they don’t translocate to roots. Horticultural vinegar typically needs reapplication every 3-5 days until weeds die completely (2-3 total applications for annuals, 4-6 for perennials). Boiling water usually requires 2-3 applications spaced 3-4 days apart for perennial weeds with deep roots, but one application often suffices for annuals. Corn gluten meal (natural pre-emergent) needs reapplication every 4-6 weeks during growing season. Effectiveness depends on weed species, growth stage, and environmental conditions. Young weeds require fewer applications than mature specimens. Persistence is key with natural methods—they work but demand greater time investment than synthetic alternatives.
Q: Why did my grass turn yellow after weed treatment?
📖 Leggi anche: How to Get Rid of Houseplant Pests: Identify, Treat & Prevent Every Common Bug
Yellow grass after herbicide application usually indicates: temperature stress (applied above 85°F or below 50°F), over-application (exceeding label rates), grass species sensitivity (St. Augustine and centipede are particularly sensitive), or application to stressed grass (drought-stressed or newly seeded). Minor yellowing from appropriate broadleaf herbicide use often resolves within 7-14 days as grass metabolizes the chemical. Provide adequate water (1 inch per week) and avoid additional stressors. If yellowing persists beyond 3 weeks or worsens, grass may not recover. Future prevention requires treating only during optimal conditions (60-85°F, calm days, well-watered grass) and using grass-safe formulations specific to your turf species.
Per approfondire: How To – Wikipedia